What Is A Floating Shelf, And How Do You Make Floating Shelves By Yourself?
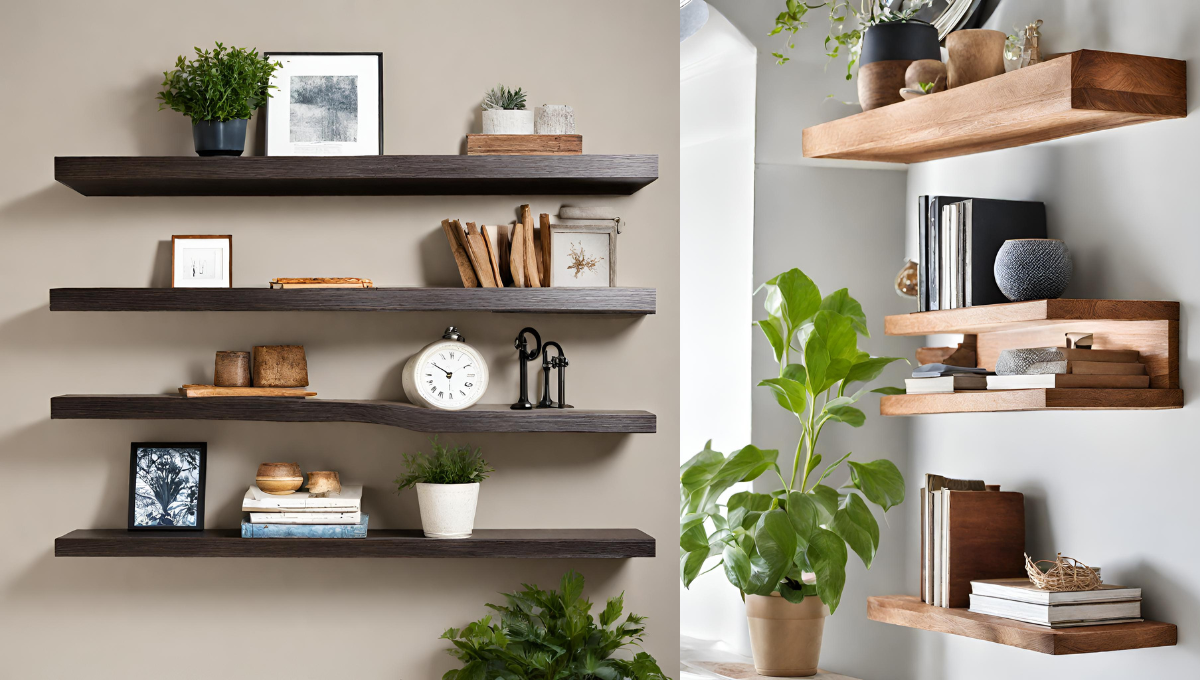
Floating shelves, otherwise called wall-mounted racks or bracketless racks, are a kind of racking framework intended to give the appearance that the frames are “drifting” on the wall without noticeable sections or supports. These racks are a well-known decision for their spotless and present-day taste, and they can be utilized to show things or give stockpiling while at the same time adding a moderate and smooth touch to a room.
Vital elements of floating shelves include:
Imperceptible Backings:
Unlike conventional racks that utilize apparent sections or supports, floating shelves utilize stowed mounting frameworks to make the deception that the frames are unsupported and drifting against the wall.
Moderate Plan:
Floating shelves regularly have a moderate plan with clean lines and basic shapes. This plan decision permits the attention to be on the things shown on the racks instead of the racking itself.
Different Materials:
Floating shelves can be produced using different materials, like wood, metal, glass, or acrylic. The decision of fabric can impact the rack’s general appearance and strength.
Simple Establishment:
Introducing floating shelves includes connecting the mounting equipment to the wall and setting the racks onto the equipment. The hidden mounting frameworks, including sections, stowed-away quotes, spikes, or other imaginative arrangements, can change.
Flexibility:
Floating shelves like lounges, kitchens, and washrooms can be used in house rooms. They’re reasonable for showing beautifying things, books, photo placements, plants, and additional items.
Space-Saving:
Floating shelves don’t occupy floor rooms, making them an extraordinary choice for more modest rooms or spaces where floor space is restricted.
Adaptable Plans:
Floating shelves can be set up in different arrangements, like staggered designs, even formats, or single racks as proclamation pieces. Subsequently, it’s pivotal to observe the maker’s rules and guarantee appropriate establishment to guarantee the shelves are secure and can uphold the expected things.
Open and Breezy Feel:
Since they don’t have noticeable sections, floating shelves create a feeling of transparency and permit the wall behind them to stay apparent, adding to a more vaporous and open feel.
How to make floating shelves without anyone else
Making solid floating shelves includes cautious preparation, legitimate materials, and secure establishment. Here is a bit-by-bit manual to assist you with making floating shelves that are both alluring and solid:
Materials You’ll Need:
- Wood for the racks
- Wall sections or secret rack sections
- Level
- Stud locator
- Screws and anchors (if not mounting straightforwardly to studs)
- Wood screws
- Drill
- Screwdriver
- Estimating tape
- Sandpaper
- Paint or finish (whenever wanted)
Steps:
Plan and Measure:
Settle the size, number, and area of your floating shelves.
Measure the space where you expect to introduce the racks. Think about the ideal profundity and width of every frame.
Pick Your Wood:
Settle on durable and outwardly engaging wood, like hardwood or pressed wood. The timber should be sliced to your racks’ ideal length and width. These racks are a well-known decision for their spotless and present-day taste, and they can be utilized to show things or give stockpiling while at the same time adding a moderate and smooth touch to a room.
Cut and Sand the Wood:
Slice the wood to the exemplary aspects utilizing a saw.
Smooth the edges and surfaces of the wood by sanding to ensure a polished finish.
Prep the Sections:
Assuming you’re utilizing wall sections, adhere to the maker’s directions to join them to the wall. Utilize a level to guarantee they are straight.
Assuming you’re utilizing stowed-away rack sections, these will be mounted inside the rack and will not be apparent from the front.
Track down Studs:
Utilize a stud locater to find the wall studs in the space where you’ll introduce the racks. Mounting the racks to studs gives more prominent security.
Introduce Sections or Secret Sections:
In the case of utilizing sections, mount them safely to the wall using screws and anchors if necessary. Guarantee they are level.
When utilizing stowed-away sections, please adhere to the producer’s guidelines for their establishment inside the racks.
Connect the Racks:
Place the wood racks onto the mounted sections or secret sections. When utilizing stowed-away cells, ensure they are appropriately adjusted and safely appended to the shelves.
Secure the Racks:
Drill pilot openings into the wood, where you’ll append the racks to the sections.
Secure the shelves to the units utilizing wood screws.
Level and Last Changes:
Utilize a level to guarantee the racks are straight and adjusted.
Make any fundamental changes following the sections or screws to accomplish a level and secure fit.
Last little details:
Sand any harsh edges or surfaces on the racks.
Whenever you want, paint or finish the racks to match your style. Make sure to involve proper colors or wraps up for your wood.
Test for Solidness:
Before putting things on the racks, please give them a delicate shake to guarantee they are safely connected and stable.
Conclusion
It’s vital to note that while floating shelves give a smoothed-out and exquisite look, their weight limit may be lower than racks with conventional sections. Subsequently, it’s pivotal to observe the maker’s rules and guarantee appropriate establishment to guarantee the shelves are secure and can uphold the expected things.
Via cautiously following these means and utilizing excellent materials, you can make floating shelves that are outwardly engaging and areas of strength for as steady. Continuously focus on wellbeing and legitimate establishment while chipping away at home ventures like this. If you need more clarification about any part of the interaction, seek guidance from an expert or experienced DIYer.
Generally, floating shelves are an up-to-date and practical method for adding capacity and an enriching component to your living space while keeping a contemporary and cleaned-up appearance.